Flat Felled Seam Tutorial
Table of Contents
Flat felled seam is a very common seaming technique most often seen on jeans. This sewing method has a long history and is still used in both hand sewing and machine. Formerly, it was the only method of sewing fabrics. Here, you will find the definition, uses as well as the directions for making this seam.
What is the Flat Felled Seam
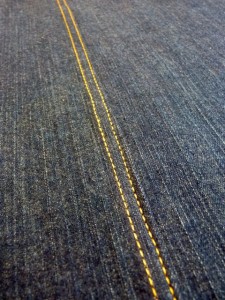
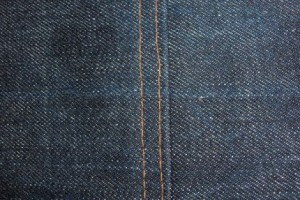
It is the seam seen on a wide range of garments such as the legs of jeans pants and shirt sleeves. This seam is created by interlocking or overlapping 1 seam allowance with another and then top-stitching them together on the garment with 2 parallel stitch rows. The durable seams have three rows of stitches, with two of them securing multiple layers of fabric. One of the main advantages of the Flat felled Seams is that they conceal the raw edges made by the seam allowance. This reduces the chances of fraying.
Flat Felled Seam Uses
This seaming technique is commonly used for giving a sporty look to different garments. They can be seen on shirts, trousers, blouses, skirts as well as casual slacks. It is also used for various purposes other than clothing. For example, the seams can be found on several outdoor fabric items like backpacks, hammock and tents as well as on accessories like tote bags.
Materials Necessary for Flat Felled Seam
It is quite easy to sew these seams at home. You will need the following materials and tools for learning the method:
- The pieces of fabric you want to join together
- Sewing Machine
- Pinking shears or scissors
- Pins
- Thread
- Iron
How to Sew a Flat Felled Seam
Most sewing machines have a specialty foot, such as ‘lap seam foot’ and ‘felling foot’. You will need a regular standard presser foot to make these seams. Following is the step-by-step instruction for doing the Flat Felled Seam yourself using a serger:
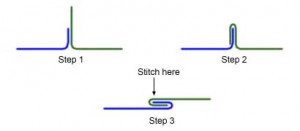
- Step 1: Recognize and mark the right-side and the wrong-side of the fabric you are about to sew. This helps you to adjust the fabric more easily while following these steps. The following diagram shows the basic steps required for making this seam:
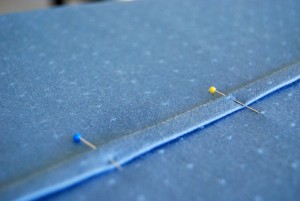
- Step 2: Pin the material together with the wrong-side facing outward. You need to pin the entire length of the fabric’s edge where you will be making the Flat Felled Seams.
- Step 3: In this step, you need to stitch a 5/8 inch long seam allowance (or the specified number in your pattern, if you are working with a pattern) along the length of your fabric’s edge pinned in the earlier step. It is important to back-tack the uneven edge at the beginning as well as the end of your seam to keep the work clean. The pins can be removed once you have completed sewing the seam allowance.
- Step 4: Then you have to cut 1 side of your seam allowance to within ¼ inch of the stitches. You can use either pinking shears or ordinary scissors for cutting the sewing allowance as the cut edges will no longer be visible once you complete the Flat Felled Seam.
- Step 5: In the next step, you need to press the seam closed to the short side of the seam allowance on the fabric’s wrong-side. Make sure to use a suitable setting on the iron so that your fabric does not get damaged.
- Step 6: Make sure to press the right-side of the fabric thoroughly to ensure that it is completely flat. It is advisable to use a pressing cloth to prevent any damage to the fabric due to ironing.
- Step 7: In this step, hold the un-trimmed wider side of seam allowance and fold it over the narrow side. Continue folding in this manner until the wider side’s edge reaches the stitching line of the seam. When folded properly, the un-trimmed side will conceal the narrow side completely. Then, grasp the folded seam and start folding it again in the same direction. Continue folding until the seam becomes flattened against its opposite side in a manner that it can be pinned again.
- Step 8: Pin the entire length of the flattened fold so that it can be seamed.
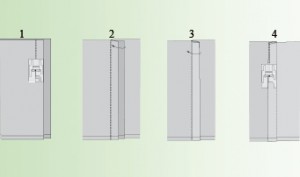
- Step 9: Stitch Line (i) – Stitch 1/8 inch from the folded edge along entire length of your flattened and pinned fold. You need to back-tack the uneven edge properly at the beginning as well as at the end of seam. You can remove the pins from the fabric once they reach the machine’s presser foot. You can now see 1 of the 2 completed top stitch lines on your fabric’s right-side. You have completed the stitch line (i).
- Step 10: Stitch Line (ii) – Stitch 1/8 inch from the original seam along the length of the flattened fold while back-tacking both at the beginning and at the end of seam, like in the earlier step. You need to keep this second stitch line parallel to the stitch line made in step 9. Now you can see both the finished stitch lines on the fabric’s right-side. Stitch line (ii) is now complete. At this point, you will be able to see three stitch lines on the wrong-side of your fabric while there are only two stitch lines visible on the right-side. The raw edges will also be completely concealed inside the seams.
- Step 11: Press your finished Flat Felled Seam on the fabric’s right-side to flatten it as much as possible. Make sure to use a suitable setting to prevent any damage to your fabric. You have now learnt this useful seaming technique.
Making Double-needle Flat Felled Seam
The instructions for making the double needle Flat Felled Seam are given below:
- First you need to seam the edges of your fabric, keeping its right-sides together and using a single needle. Next, the seam allowance has to be trimmed to half inch. Then, use an iron to flatten the seam allowance against the back of your fabric.
- In the next step, replace your single needle with a twin needle (4 mm/90). You also need to add another reel of thread to your sewing machine.
- Now, place your sewing project with the right-side up and the seam on its left side under the foot (along with the seam allowance). Position your twin needle in a manner so that the left needle can stitch next to the seam stitched in the first step.
- In the last step, you need to topstitch the seam to complete the stitch line.
Flat Felled Seam Limitations
This method is often unsuitable for extremely bulky or heavy fabrics. The limitations of the seeming technique are usually determined by the sewing machine’s capacity. Using the Flat felled Seam on a curve (for purposes like placing sleeves into armholes) should also be avoided unless you are an expert in this procedure.
Difference between Flat Felled Seam and French Seam
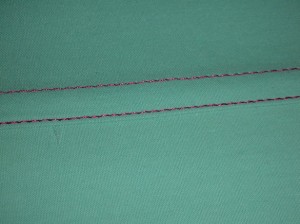
The Flat Felled and the French Seams are often mistakenly considered to be two names for the same stitching method. The main difference between these two procedures is that the earlier one shows the stitching lines on the right-side of the fabric while the latter does not. Due to this reason, the Flat Felled Seam is commonly used on casual garments while the French seam is generally found in more expensive evening clothes.
The above images show the difference between the Flat Felled and the French Seams. The image on the left is Flat Felled Seam with the two visible stitching lines while the picture on the left shows French Seam with almost invisible stitching lines.
Now you have learnt how to do the Flat Felled Seam yourself at home. Go on and try making something new with this seaming technique. Just remember to use a wider seam allowance if you are working with extremely heavy fabrics like canvas or duck.
Related Articles
Join Our Mailing List
Sign up to get the latest updates, along with fresh patterns and tutorials, right to your inbox

